Configuração inicial
After completing the initial installation, you must configure parameters in Dolibarr to match your needs.
Company/Organization
The first mandatory step is to define your company/organization information. For this, from home page, choose menu "Home->Setup->Company/Organization" and add the information for your company/organization.
- Name: Name of your company/organization
- Logo: Add here a logo of your company (.png, .jpg or .gif). It can accept any size but it is recommended to use a logo with 130 pixels height and up to 800 pixels width. Here is a little scheme on what will be the result on the PDF. The recommended format is png with NO transparent layer (Dolibarr uses FPDF that does not support this format).
- Logo (squared): Add here your squared logo (.png or .jpg) that will be used in the top right corner of the application
- Fiscal Year: Define your starting month of yiscal Year
- Country: Define your country: other options depend on this selection.
- Sales Tax (VAT) Management: Define how you manage Sales Tax (or not).
- Second type of tax: Define if you would like to use second type of taxe (or not).
- Third type of tax: Define if you would like to use third type of taxe (or not).

Modules

The activation of modules is the second mandatory step. Which modules you will activate depends on what you want to do with Dolibarr. In most cases, you may want to use all modules. You have to activate each module one by one. For example, to manage a company, you might activate at least modules Third party, Invoices, and Products, but probably many more.
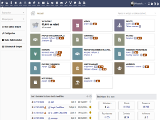
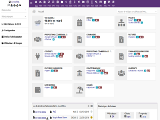
To activate a module, go to page "Home->Setup->Modules" and click the button 'on/off' in the "Status" column to enable it.
- The module is on if the 'on/off' button is like

- The module is off if the 'on/off' button is like

The list of standard modules is defined on page List of Modules.
If you are unsure of the function of a module, you may activate it and see what new menu item appears in Dolibarr (the horizontal bar), also after activating a module, check that you grant to yourself permissions on new features that were enabled. You can activate or deactivate a module when you want.
Once a module has been activated, it may need further configuration (click on the setup icon that appears on the right of module line if a module needs its own setup). See documentation of module for more information.
Display

On this page, you can set the default language of application and the look and feel of screens. In a first use, you can keep everything with default values.
Language
In the language settings, you can set the Default Language. By default it is set to "Auto Detect". Note: Activating multilanguage option will allow you to be able to set the preferred language of customers, to print their Invoice/Proposal/Order in their own language. Product translations will also be available.
Default skin theme
In Dolibarr you have two different skins :
- eldy
- md


More skins can be downloaded on the dolistore [1]
You can also personalize the skin color, and look in this setup
Miscellaneous
On this section, you have all the default values of features like, javascript functions, length of lists, first day of the week, etc.
You can also put a "Message of day" that will be displayed for all the users. In this message, you can use the Variable substitution system
Login page
On this section, you can customize the login page with a message and a background image. In this message, you can use the Variable substitution system
It is also possible to hide/show the "Need help or support" link on login page
Menus

Choose here which menu manager you want to use for internal and external users and for computer or smartphone. The menu manager changes the labels, orders and organization of the left and top menus. See page Menus system for more information.
Menu handlers
The software comes with two different menu handler :
- Eldy : It is the default menu, the menu entries are centralized and hard coded. You can add entries on this menu but not change the default menu entries.
- Auguria : It is a database menu manager. This menu can be fully customized to your needs.
In the Menu handlers tab, you can choose the menu for internal and external users and for computer or smartphone.
Menu Editor
In this tab, you can customize each menu entry of auguria menu or the additional entries of eldy menu and create new entries
Miscellaneous
In this tab, you can choose the behavior of the unauthorized menu entry. By default, the unauthorized menu entry are in gray, but can be hidden.
Other (Widgets, Alerts, Security, Limits and accuracy, Emails, SMS, Dictionary setup...)
Other entries in Setup menu are advanced options. You can ignore them if you want.
- Setup Translation
- Setup Default values/filters/sorting
- Setup Widgets
- Setup Alerts
- Setup Security
- Setup Limits and accuracy
- Setup PDF
- Setup EMails
- Setup SMS
- Setup Dictionary
- Setup Other
Users
The last step is to create users and assign permissions. Almost all the modules even activated earlier, are not accessible if you do not give permissions. To do this, you can go to the menu Home -> Users & Groups to define users and their rights. Attention, you should consider to check and reset the user rights when you enable a new module. The list of rights available depends on the activated modules (see above). It is recommended to configure permissions after activating the modules you want to use. For certain actions, if you do not have the rights to do an action, Dolibarr will not show you the action. You might miss some useful or important features. To give rights to a user or yourself, if you are an administrator, go to Home -> Users & Groups, select the desired user, then click on its 'Permission' tab.
You can avoid these configuration steps for each newly created user, by configuring the default rights (understand rights allocated automatically each time a new user created) by configuring the default permissions on the menu Setup Security.